Sunday, October 28, 2012

Old Baking Pan

 
I found this Old Baking Pan at Smith and Edwards and decided to make it into a wall hanging.
It was pretty rusty and dirty when I found it so I cleaned it good with steel wool and spray painted it brown.
The rest is just scrapbook paper modge podged on the squares!


Thursday, October 25, 2012

My Sweet Kids

 
What a Wonderful Fall Day!!
I made my kids drive to Snow Basin for Fall pictures. I had a great time but they weren't thrilled about the picture part! :)
 
I love just LOVE them!!

Halloween Felt Owls

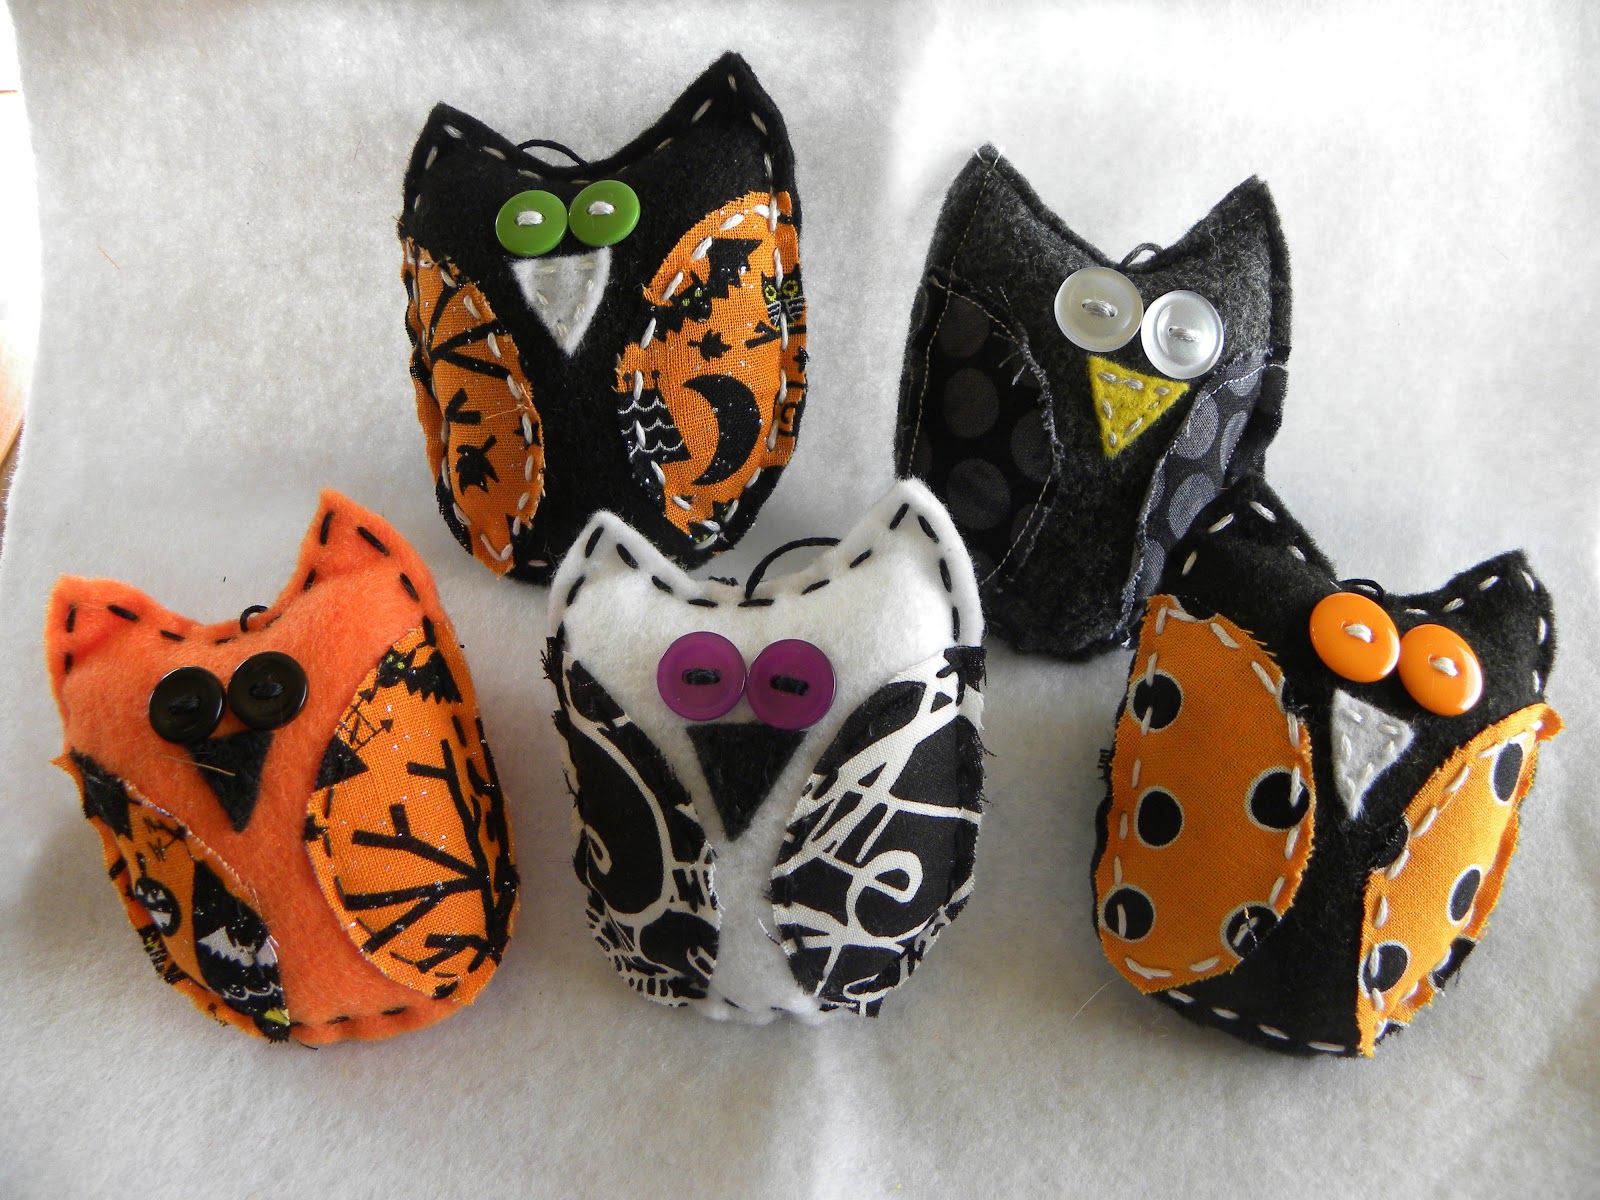
These Owls are a fun family craft that we make often! My kids made a bunch of them this summer and sold them at our local Farmers Market. They had so much fun!
All you need is .....
FELT: Cut into an Oval and then cut a notch on the top for the ears. I practiced on cardboard first until I had the pattern the way I liked it. Then I just trace that pattern onto the felt.
PRINTED MATERIAL: This is for the wings. Cut a circle and then.... cut the circle in half. Flip them around and you have the wings!
2 BUTTONS : for the eyes
FELT TRIANGLE: for the nose
THREAD: to hand sew around the wings, nose and edges
STUFFING: for the insides
We made these so we could hang them on a branch in our entryway for Halloween but we make them for all occasions.
 
HAPPY HALLOWEEN!!!


Sunday, October 14, 2012

Fabric Storage

 
BEFORE

 
AFTER
 
 
Another FUN day at Smith and Edwards!! I saw this wonderful box there last weekend but didn't have a truck to hall it home in. So thanks so my sweet and patient husband I was able to bring it home yesterday ( along with some other wonderful finds! ) This storage box looked like it was used to organize screws, bolts, and other small parts and pieces. It was made to lay flat on the ground but I like the cupboard look and it doesn't take up as much room in my craft area. I like the look of the rustic worn wood so I just painted lightly over the rough wood with a paint brush and small amounts of paint. Now I have a new storage cupboard for my Fabric! Low cost and easy to clean up........Those are my favorite finds!

Thursday, October 4, 2012

Old Metal Drawer

 
You never know what you'll find when digging in the junk yard at Smith and Edwards.
I found this cute blue metal drawer and hung it in my bathroom as a shelf. Now I want more drawers!!
The possibilities are endless!

Wednesday, October 3, 2012

Wood Block

 
I'm in love with clocks ! So here's an easy decoration anybody can make! Just Modge Podge any paper onto the block and add your own personal touch. I layered paper flowers on the top with sheer ribbon and topped that with a crystal knob.  EASY!

Tuesday, October 2, 2012

Teacher Appreciation


The PTA supplied lunch for the teachers today and I was able to help with the table decorations. That's what I love to do! I liked how this sign turned out. It was so simple to make..... the letters of course were cut from the cricut and the flower was cut from the cuttle bug. The frame is a magnet board so it's easy to change for every occasion.  I love the projects that you can whip up in 10 minutes or less!

Sunday, September 30, 2012

Shadow Box

 
My Grandpa made this Shadow Box for me when I was a kid. It was stained brown but didn't match the decor in my house so I spray painted it black and found things around my house that I love or have special meaning to me to fill it up. Now instead of sitting in my closet it sits in my entry way so I can show off the things that are close to my heart.

Saturday, September 29, 2012

Paper Flowers


These Paper Flowers are so much fun to make! You just cut them out on the cricut , roll and bend them the way you want and look what you get! I also used a ink pad to make them look vintage. I glued them together with a strong jewelry glue and put the wire through the middle while the glue was still wet. The stand is an insulator that I found at Smith and Edwards in the junk yard. I love that place!! Tie ribbon around it and there you go! A simple ( and affordable ) gift for anyone or decoration for yourself!

Owl Gift Box

 
I found this idea in a Better Homes and Garden Halloween Magazine!
So easy to make! Cut the box out on the cricut ( I also cut all the circles for the eyes on the cricut ), then cut a simple triangle. Find some cute printed paper and cut a tree trunk type shape for the body.
You can use these for gift card holders or fill it with candy and give it to a friend!

Composition Notebook

 
I made this notebook for my daughter right before school started. She is so fun..... she loves vintage stuff . How great is that!! You can use any paper and modge podge to glue it together. The flower was cut out with the Cuttle Bug with a sizzix die cut. I used a Craft Cover Button Kit for the button in the flower. These would make cute Teacher Gifts!
My 10 year old daughter came home with one of these that she had made at a birthday party. What a great idea for birthday parties!

Halloween Gifts

 
A friend of mine found these great glass bottles for me at Smith and Edwards! Only .99 cents each!
I needed a couple Thank You Gifts so I filled them with Hot Chocolate and decorated them so they could be used as a Halloween Decoration too!

Friday, September 28, 2012

Handmade Furniture


I asked my husband to make me a Mudroom type cabinet for my hallway to catch all the jackets and backpacks that get thrown on the floor every day. I'm not super great at explaining what I want so Thank Goodness he's a good listener!! Look what he came up with! It's perfect and exactly what I wanted!!
Now if I can just get the kids to hang their jackets up!  Kids......ya gotta love um!

Friday, September 21, 2012

Garage Sale Find


A good friend of mine took me to the BEST garage sale that I've ever been to! Seriously!!
Tons of Vintage Furniture, Boxes, Glass Jars, Frames. I could go on forever........
The homeowner was so nice she even let us look inside her house that's decorated with so many unique treasures that her family has collected on their journeys.
This chair was a cute rustic orange when I bought it but I decided to spray paint it black and then sand the edges to bring out the orange.

Thursday, August 23, 2012

Welcome

Welcome to my blog.  Hope you find something you love and come back and visit often.